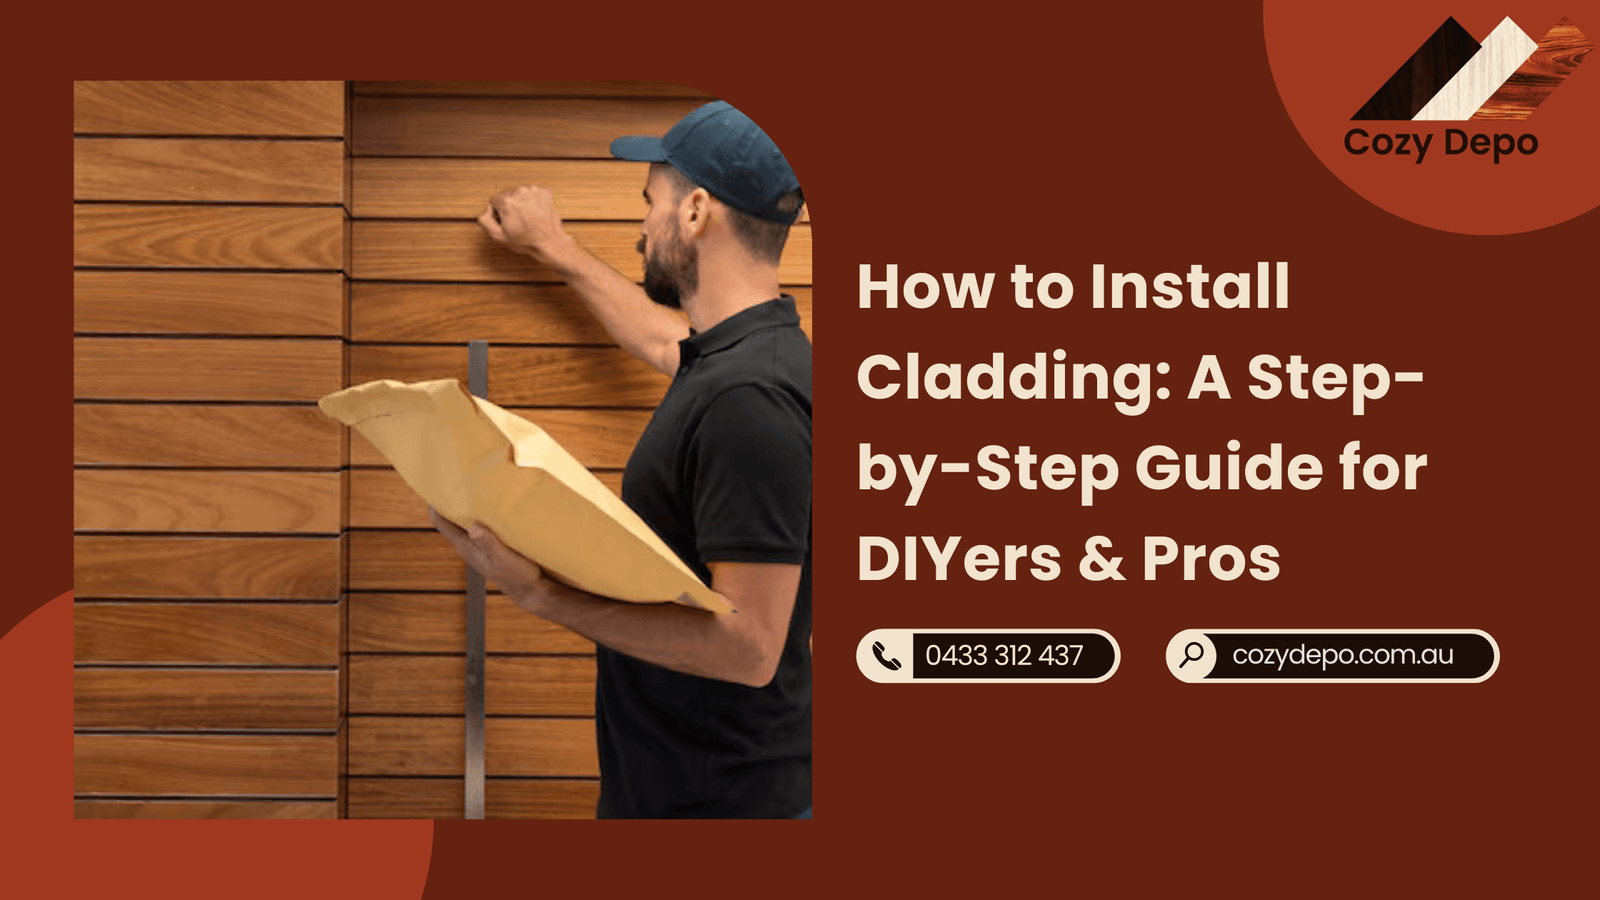
Thinking About Installing Cladding Yourself?
Whether you’re sprucing up a bathroom wall or transforming an outdoor facade, installing cladding is a smart way to boost style, durability, and insulation — fast.
At Cozy Depo, we supply installation-friendly WPC and PVC cladding that’s ideal for both homeowners and tradies. This guide breaks down the steps, tools, and tips to help you get a flawless finish — the first time.
Tools & Materials You’ll Need
✔ For Internal (PVC) Cladding:
-
PVC cladding panels
-
Adhesive or screws + plugs
-
Measuring tape
-
Level
-
Fine-tooth saw or utility knife
-
Silicone sealant (optional for wet areas)
✔ For External (WPC) Cladding:
-
WPC cladding boards
-
Starter clips & hidden fixings
-
Screws (stainless steel recommended)
-
Level, drill, saw
-
Flashing and waterproof membrane (if required)
Step-by-Step: Installing Internal Cladding (PVC)
1. Prepare the Surface
-
Ensure the wall is dry, clean, and smooth.
-
Remove any fixtures, fittings, or obstructions.
2. Measure & Mark
-
Measure the wall height and cut panels to size.
-
Use a spirit level to draw a guide line at the top or bottom of the wall.
3. Apply Adhesive or Fixings
-
For adhesive: Apply strong grab adhesive in vertical beads.
-
For screws: Pre-drill and fix at panel joints through the tongue (hidden once locked in).
4. Fit First Panel
-
Press firmly into position, ensuring it’s level.
-
Work from left to right (or bottom up if vertical install).
5. Continue Paneling
-
Slide each new panel into the previous one via the tongue-and-groove system.
-
Cut panels as needed around windows, powerpoints, etc.
6. Seal Joints (Optional)
-
Use silicone sealant in corners or joins for wet areas like bathrooms.
Step-by-Step: Installing External Cladding (WPC)
1. Wall Prep
-
Check structure is solid and flat.
-
Install timber battens (recommended 400–600mm spacing) for ventilation and support.
2. Fix Starter Strip
-
Screw the metal or composite starter strip level at the base of the wall.
-
This guides your first board and creates clearance.
3. Install First Cladding Board
-
Slot into the starter strip and secure using hidden fasteners.
-
Don’t overtighten — boards need small movement room for expansion.
4. Continue Upwards
-
Attach each board with hidden clips.
-
Stagger joints where possible for a clean aesthetic.
5. Corner & Edge Trims
-
Use matching trims and flashings for a professional finish and weather protection.
6. Seal & Finish
-
Inspect for gaps, fixings, and alignment.
-
Clean up dust and debris. Job done.
Common Mistakes to Avoid
- Skipping battens on uneven walls
- Using the wrong screws (rust risk = long-term damage)
- Not allowing expansion gaps (especially with WPC)
- Poor alignment — one crooked board throws off the whole wall
- Not sealing joins in wet areas (internal PVC)
Pro tip: Always read manufacturer installation instructions specific to the product. Or just call us — we’ll walk you through it.
DIY vs Hiring a Professional
|
Criteria |
DIY Cladding |
Professional Install |
|---|---|---|
|
Cost |
Lower upfront cost |
Higher, but includes labour guarantee |
|
Time |
1–3 days depending on area |
Often faster |
|
Skill Level Needed |
Basic (PVC) / Intermediate (WPC) |
Expert |
|
Finish Quality |
Depends on experience |
Consistently polished |
|
Tools Needed |
Hand tools + drill/saw |
Full trade setup |
When to DIY
-
Small internal rooms
-
Budget projects
-
Basic wall cladding
When to Hire a Pro:
-
Complex corners or multiple storeys
-
Outdoor installations exposed to weather
-
Large-scale projects or client jobs
Melbourne Installations: Need a Hand?
We partner with experienced installers across Melbourne Metro and the outer suburbs. If you’d prefer a professional install — with zero hassle — let us know.
📞 0433 312 437
FAQs
Q: Can I install cladding over existing tiles or paint?
A: Yes — as long as the surface is flat, dry, and secure. PVC cladding can bond directly to tiles using grab adhesive.
Q: Do I need to leave expansion gaps with WPC cladding?
A: Yes — allow 5–8mm at joints and ends to accommodate movement due to temperature changes.
Q: Is internal cladding waterproof?
A: PVC cladding is 100% waterproof, making it perfect for bathrooms, laundries, and wet areas.
Q: How long does cladding installation take?
A: Internal cladding can take a few hours to a day. External cladding may take several days depending on wall size and weather.